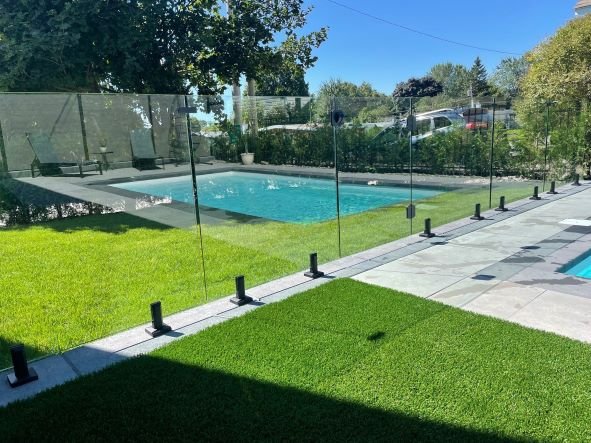
Installing a frameless glass railing with spigots can be a great way to add a modern and sleek look to your home, cabin or business. Glass railing is typically made of high-quality materials, such as tempered glass and stainless steel spigots, which are resistant to corrosion, rust, and other forms of wear and tear. This makes glass railing a durable and long-lasting option.

Here are the 6 steps to install a glass railing with spigots:
Choose the spigots
There are a variety of spigots available on the market, so choose the one that best suits your needs. Most popular products are top mounted or surface mounted spigots. In some settings, side mounted spigots are the option. Make sure the spigots are made of high-quality materials (Duplex 2205, SS 316), to ensure their durability and their resistance to corrosion. Don’t be fooled by cheaper products made from SS 304.
Measure the area
Determine the centerline of the railing. Measure the area where you want to install the glass railing to determine the length and height of the railing. The span length of each section will help you determine how many spigots and glass panels you will need.
Marking the placement and calculating the length of each glass panel
Once you have identified the total span of your section, mark the placement of your glass panel by making sure you leave a proper gap between each glass panel. We recement you leave around ¾’’ or 20mm between each glass panel. The same gap should be accounted between a glass panel and a wall.
Mark the placement of the spigots
Use a measuring tape and a pencil to mark the placement of the spigots on the surface where you will install the railing. Make sure the spacing between the spigots is equal and follows the manufacturer's guidelines. We recommend you install a spigot 8’’ from the starting of the glass panel.
Install the spigots
Align your spigot across the railing centerline and mark the 4 anchor points. Use a drill to make holes at the marked spots. Place the spigot on top of the metal base plate (should be included with your spigot) and secure them with lag screw or bolts. For a wood deck, use 3 ½’’ lag screws or bolts to ensure they are firmly attached. Use the 4 Allen set screws to level the spigot. Tighten the 4 screws or bolts firmly.

Install the glass panels:
Slide the glass panels into the spigots and make sure they are properly aligned. Use rubber gaskets level if needed. To secure the glass panel into the spigot, tighten the 2 set screws on the side of the spigots.
Contractor's tip: To quickly align you glass panel, you can install 180 degrees glass clamps or 90 degrees glass clamp between each glass sheet.
Overall, the installation process of a frameless glass railing with spigots is relatively straightforward. If you are not the handy person type or DIY, it's recommended to seek professional assistance to ensure that the railing is properly installed and safe to use.

